The Automation section is the operational core of Kanal. It lets you set up automated message flows triggered by specific customer actions or events in your store. This guide covers how to access the interface, the ways to create a flow, and the tools you can use to manage your flows.
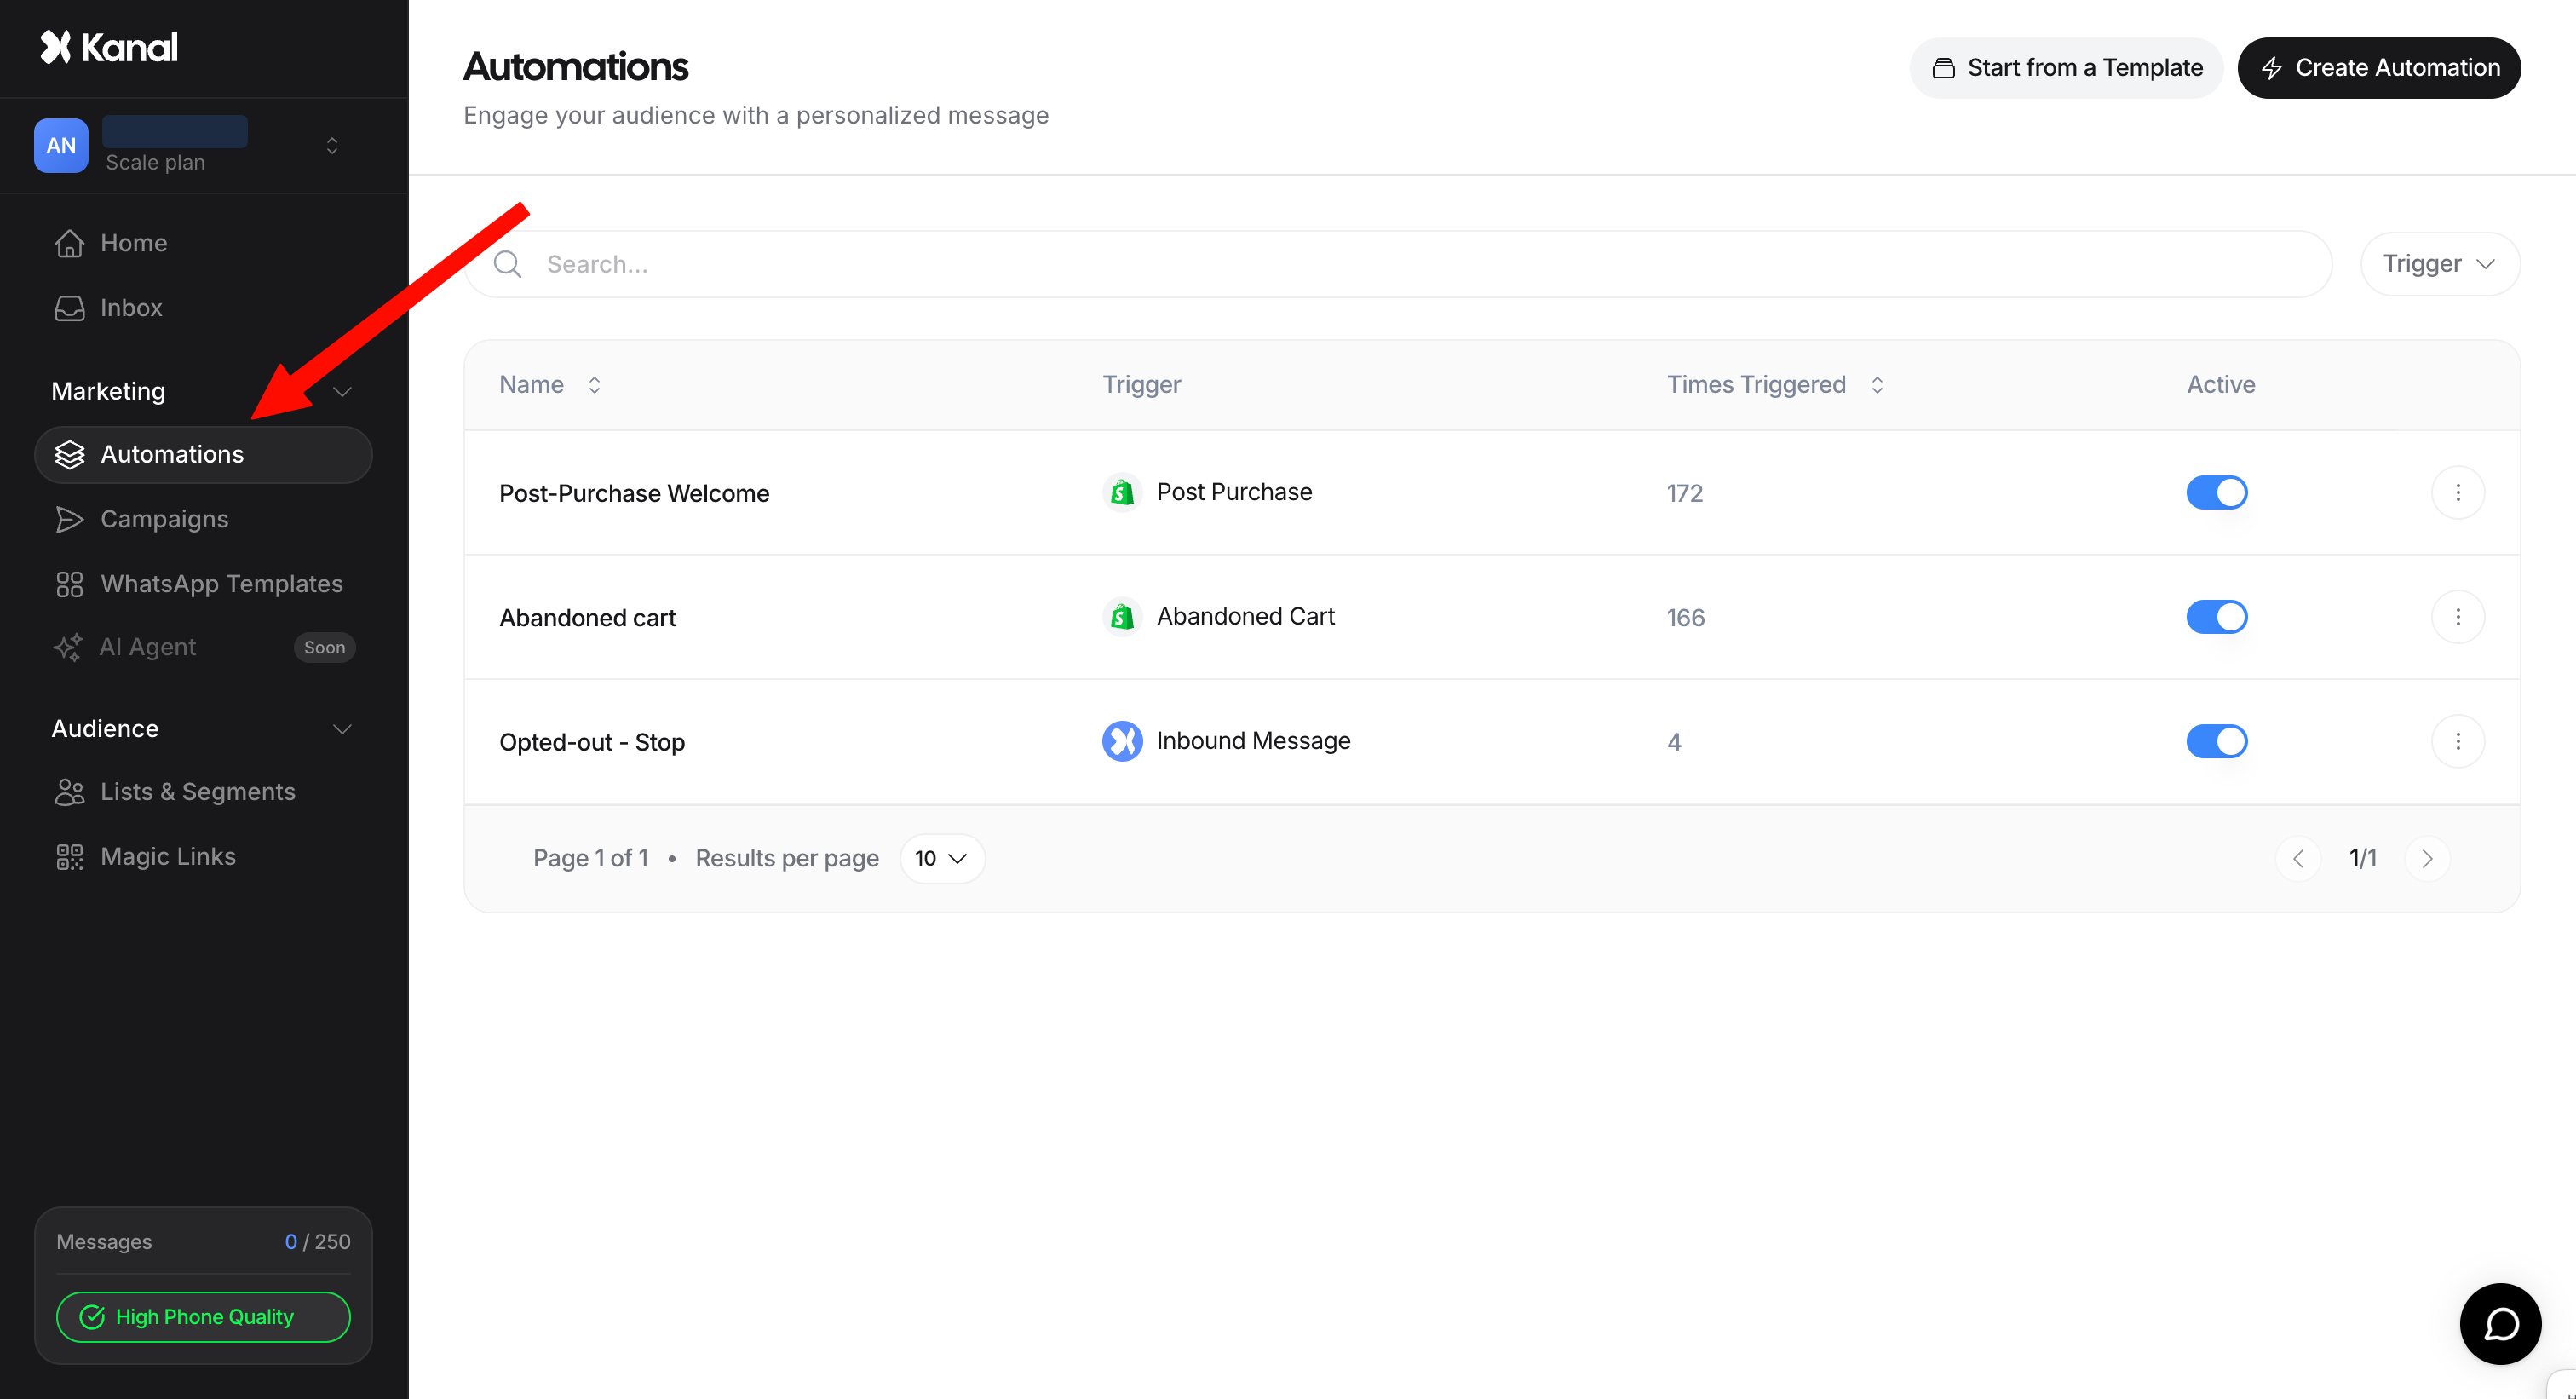
To access your automation tools, open the side menu of the Kanal platform and select the Automations section. This page centralizes all your existing flows and lets you track their performance in real time.
Kanal offers two distinct ways to build an automation, so it adapts to each user's level of expertise and customization needs.
The Start from template button opens a library of templates pre-built by the Kanal team. These templates are based on flow structures proven to perform across many users.
When you choose this option, you import a complete structure that you can then edit. Just adapt the content elements, such as text and images, to match your brand's visual identity and tone. It is the fastest way to roll out standard marketing strategies.
For specific needs or full configuration freedom, the Create Automation button lets you start from a blank page. The creation process then follows these steps:
Set the name: enter a clear name to identify the automation in your list.
Select the trigger (Trigger type): choose the event that will start the message flow.
Choosing the trigger is the most critical step because it defines the context in which the customer will receive your messages. The available trigger types are:
Post-purchase: this trigger fires the automation as soon as a customer completes an order on your store. It is mainly used for order confirmations and thank-you messages.
Abandoned cart: the automation fires when an abandoned cart is detected. This flow is essential for revenue recovery.
Shipment update: this trigger reacts to delivery status updates. It keeps the customer informed in real time about their package (shipped, out for delivery, delivered).
Inbound message: this trigger fires when a specific inbound message is detected. It lets you reply automatically to specific keywords, for example the word STOP to handle opt-outs.
Incoming Webhook: this trigger lets you start the flow from an external tool, for example a Klaviyo flow.
Once your automations are created, they appear as a list on the section's home page. Several tools help you manage them:
Each automation has a toggle showing its operating state:
Active state: when the toggle is on, the automation is live. As soon as the system detects the trigger event, the configured messages are sent to the customer.
Inactive state: when the toggle is off, the automation is paused. Even if a trigger event occurs, no message is sent. This lets you rework a flow or pause it without deleting it.
The Times triggered column shows the total number of times the automation has run since it was created. This metric is essential to confirm the flow works correctly and to gauge how many customers each flow reaches.
On the right of each row, the three-dot button opens a menu with every action available for that automation:
Performances: view the flow's detailed statistics.
Edit: open the editor to modify the flow.
Rename: rename the automation.
Duplicate: create a copy, useful to test a variation without touching the flow in production.
Turn into a campaign: turn the automation into a campaign (see below).
Push to Library: send the flow to your library so you can reuse it.
Delete: permanently delete the automation.
The Turn into a campaign option takes the content of your automation and turns it into a campaign. You reuse a scenario that already works for a one-off send to an audience you choose, without rebuilding the flow or recreating the templates.
This is useful when an automated flow performs well and you want a whole segment to receive it at once, rather than waiting for each contact to trigger the automation.
In the automations list, click the three dots on the right of the row.
Select Turn into a campaign.
Choose the campaign audience, then schedule or launch the send.