The integration between Klaviyo and Kanal lets you trigger a WhatsApp template send directly from a Klaviyo flow. In practice, you create a Kanal automation triggered by a webhook, then call that webhook from Klaviyo at the right moment in your flow.
Concrete example used in this guide: a visitor fills out the Klaviyo pop-up on your site (email + phone number), gets added to a Klaviyo list, which triggers a flow. That flow calls the Kanal webhook, which automatically sends a VIP club welcome WhatsApp template with a promo code.
On Kanal: create an automation with the Incoming Webhook trigger and add the template to send.
On Kanal: copy the connection details (destination URL, authorization header, JSON body).
On Klaviyo: add a Webhook block to your flow and paste these details into it.
In your Kanal interface:
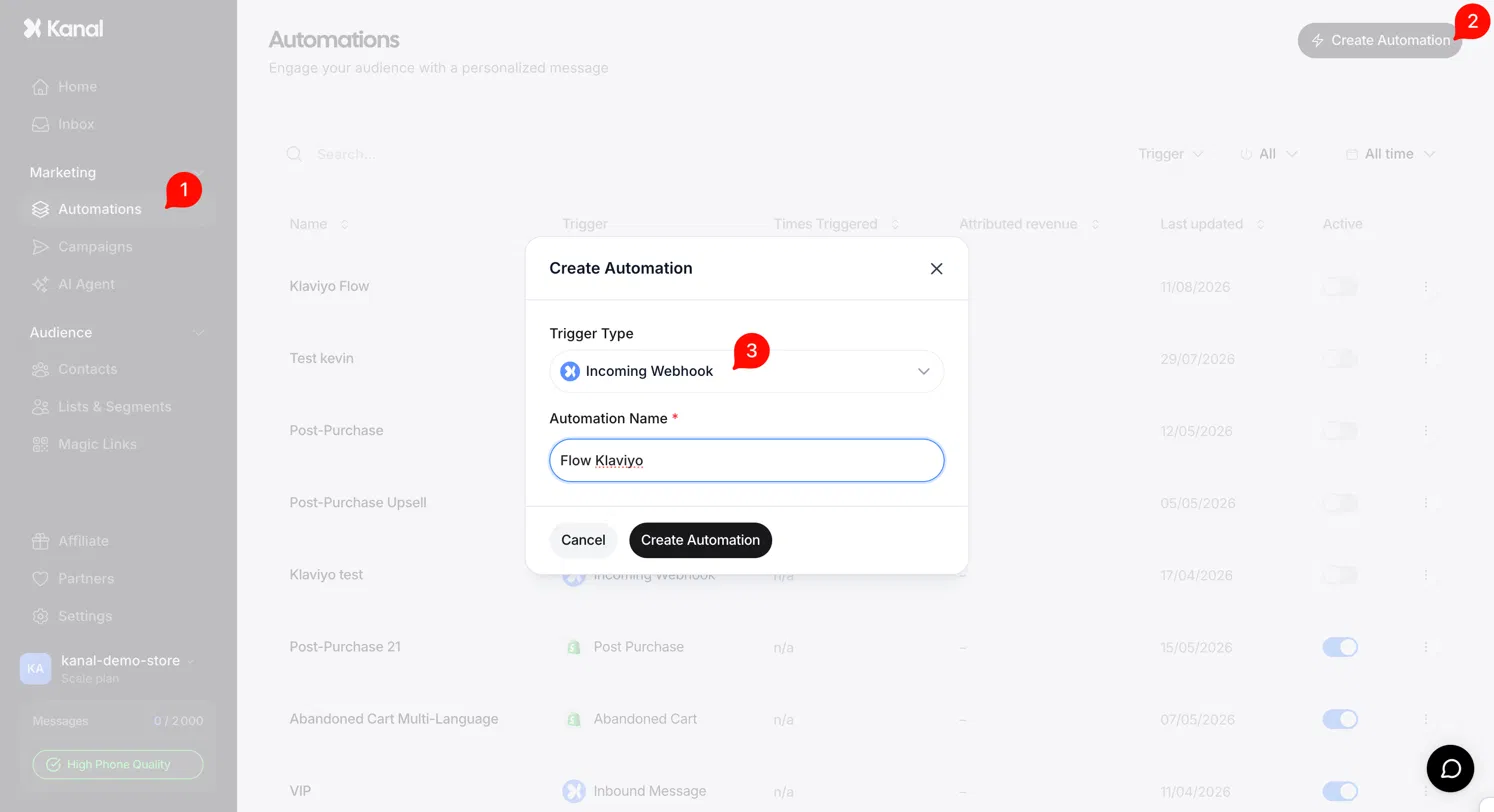
Go to the Automations section.
Click Create Automation at the top right to create an automation from scratch.
In Trigger Type, select Incoming Webhook.
Give your automation a name (for example Flow Klaviyo), then confirm with Create Automation.
Once you are in the automation editor, you see the Trigger Element (Incoming Webhook) node. Connect the WhatsApp template you want to send when Klaviyo calls the webhook.
In our example, the template thanks the customer for joining the VIP club and shares a 10% promo code. You can include variables (like the contact's first name) that are filled with the data sent from Klaviyo.
⚠ Your template must be approved by Meta before it can be sent. If an alert says "Template not approved. Please edit and submit", you first need to submit the template for review.
Click the Incoming Webhook node: a side panel opens on the right with all the data to copy over to Klaviyo. Each field has a copy icon.
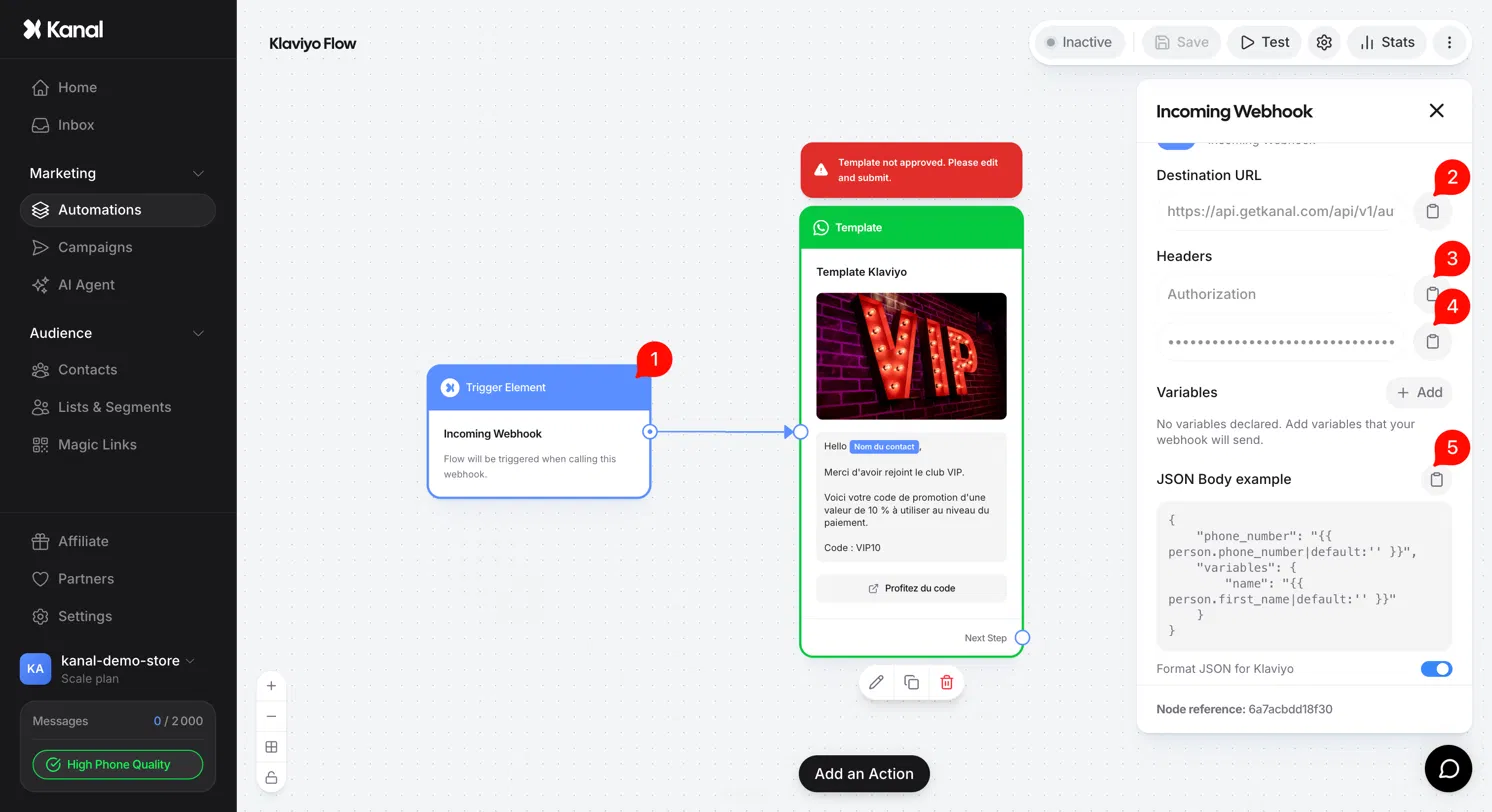
Here is what you need to grab:
The Trigger Element node: this is the entry point of your automation, the one Klaviyo will call.
Destination URL: your automation's unique URL, in the format https://api.getkanal.com/api/v1/automations/....
Header (key): the authentication header key, which is Authorization.
Header (value): your authentication token, in the format Bearer xxxxx. This token is confidential, do not share it.
JSON Body example: the request body to send. Make sure to enable the Format JSON for Klaviyo option so the JSON is directly compatible with Klaviyo's syntax.
💡 If your template contains variables (first name, promo code, etc.), declare them in the Variables section of the panel. They will automatically appear in the JSON to copy.
Now go to Klaviyo, in the relevant flow (in our example, a flow triggered when a contact is added to a list after filling out the site pop-up).
Add a Webhook block where you want it in your flow, then open its Webhook details.
In Destination URL, paste the URL copied from Kanal.
In Headers, click Add header and enter the key Authorization.
In the matching Value field, paste your Bearer xxxxx token.
In JSON body, paste the JSON body copied from Kanal.
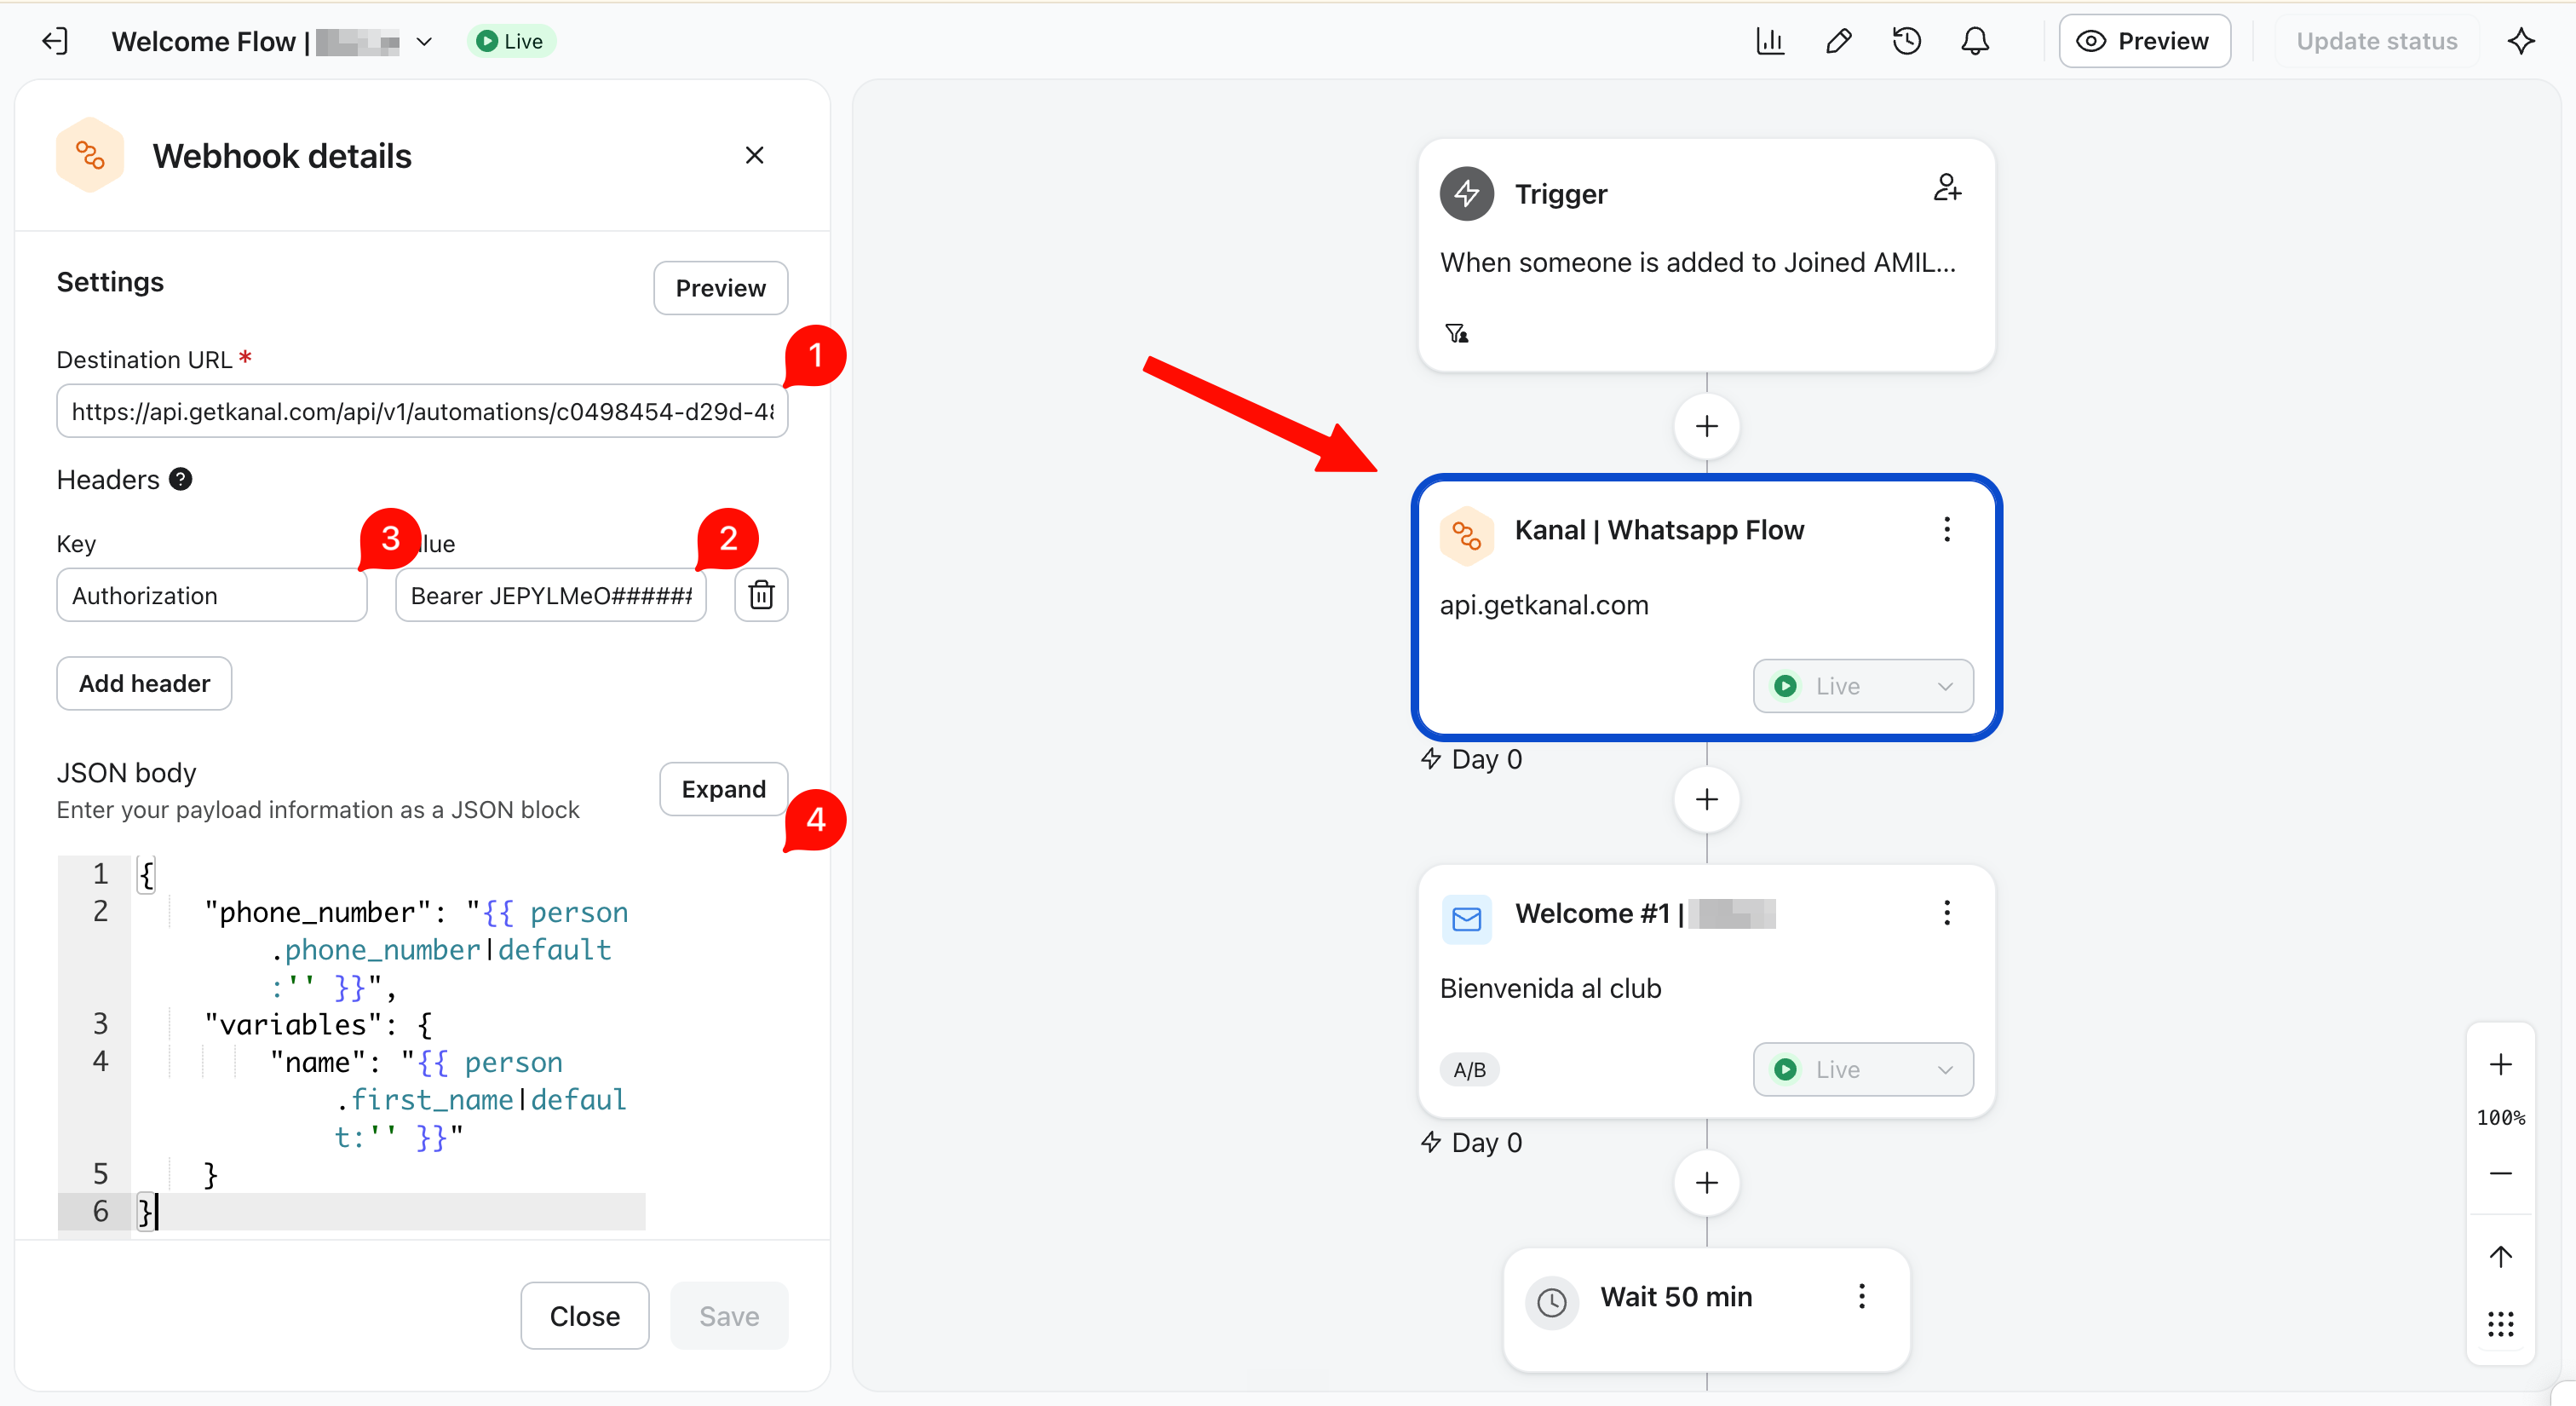
The JSON contains the contact's phone number and your template variables, filled with data from the Klaviyo profile:
{
  "phone_number": "{{ person.phone_number|default:'' }}",
  "variables": {
    "name": "{{ person.first_name|default:'' }}"
  }
}
Do not forget to click Save, then switch the block to Live to activate it.
If you want to fill one of your template variables with a specific piece of Klaviyo data:
Click "View profile & event properties".
Click the name of the property you want (it will be copied automatically).
Paste it between the quotation marks of the matching variable in the JSON body.