A campaign is no longer a simple static send, but a true campaign flow that you build visually.
This guide walks you through the steps of creating your new marketing campaigns.
Go to the Campaign section in the sidebar.
Click the create button.
Enter an internal name for your campaign (e.g. Summer 2026 Collection Launch). This name will help you identify its performance in your dashboard.
Once the campaign is created, you land on an interface identical to your automations. You can map out your campaign journey using nodes:
The trigger: By default, the starting node is called Begin Campaign. It is the entry point for all the contacts you will select later.
Add a Template: Click the add-action button to add a WhatsApp Template node.
Reminder: Your template must be approved by Meta.
Advanced personalization: Just like in your automations, you can now connect other nodes after your message (delays, conditions, or even actions like adding a tag) to create complex interactive campaigns.
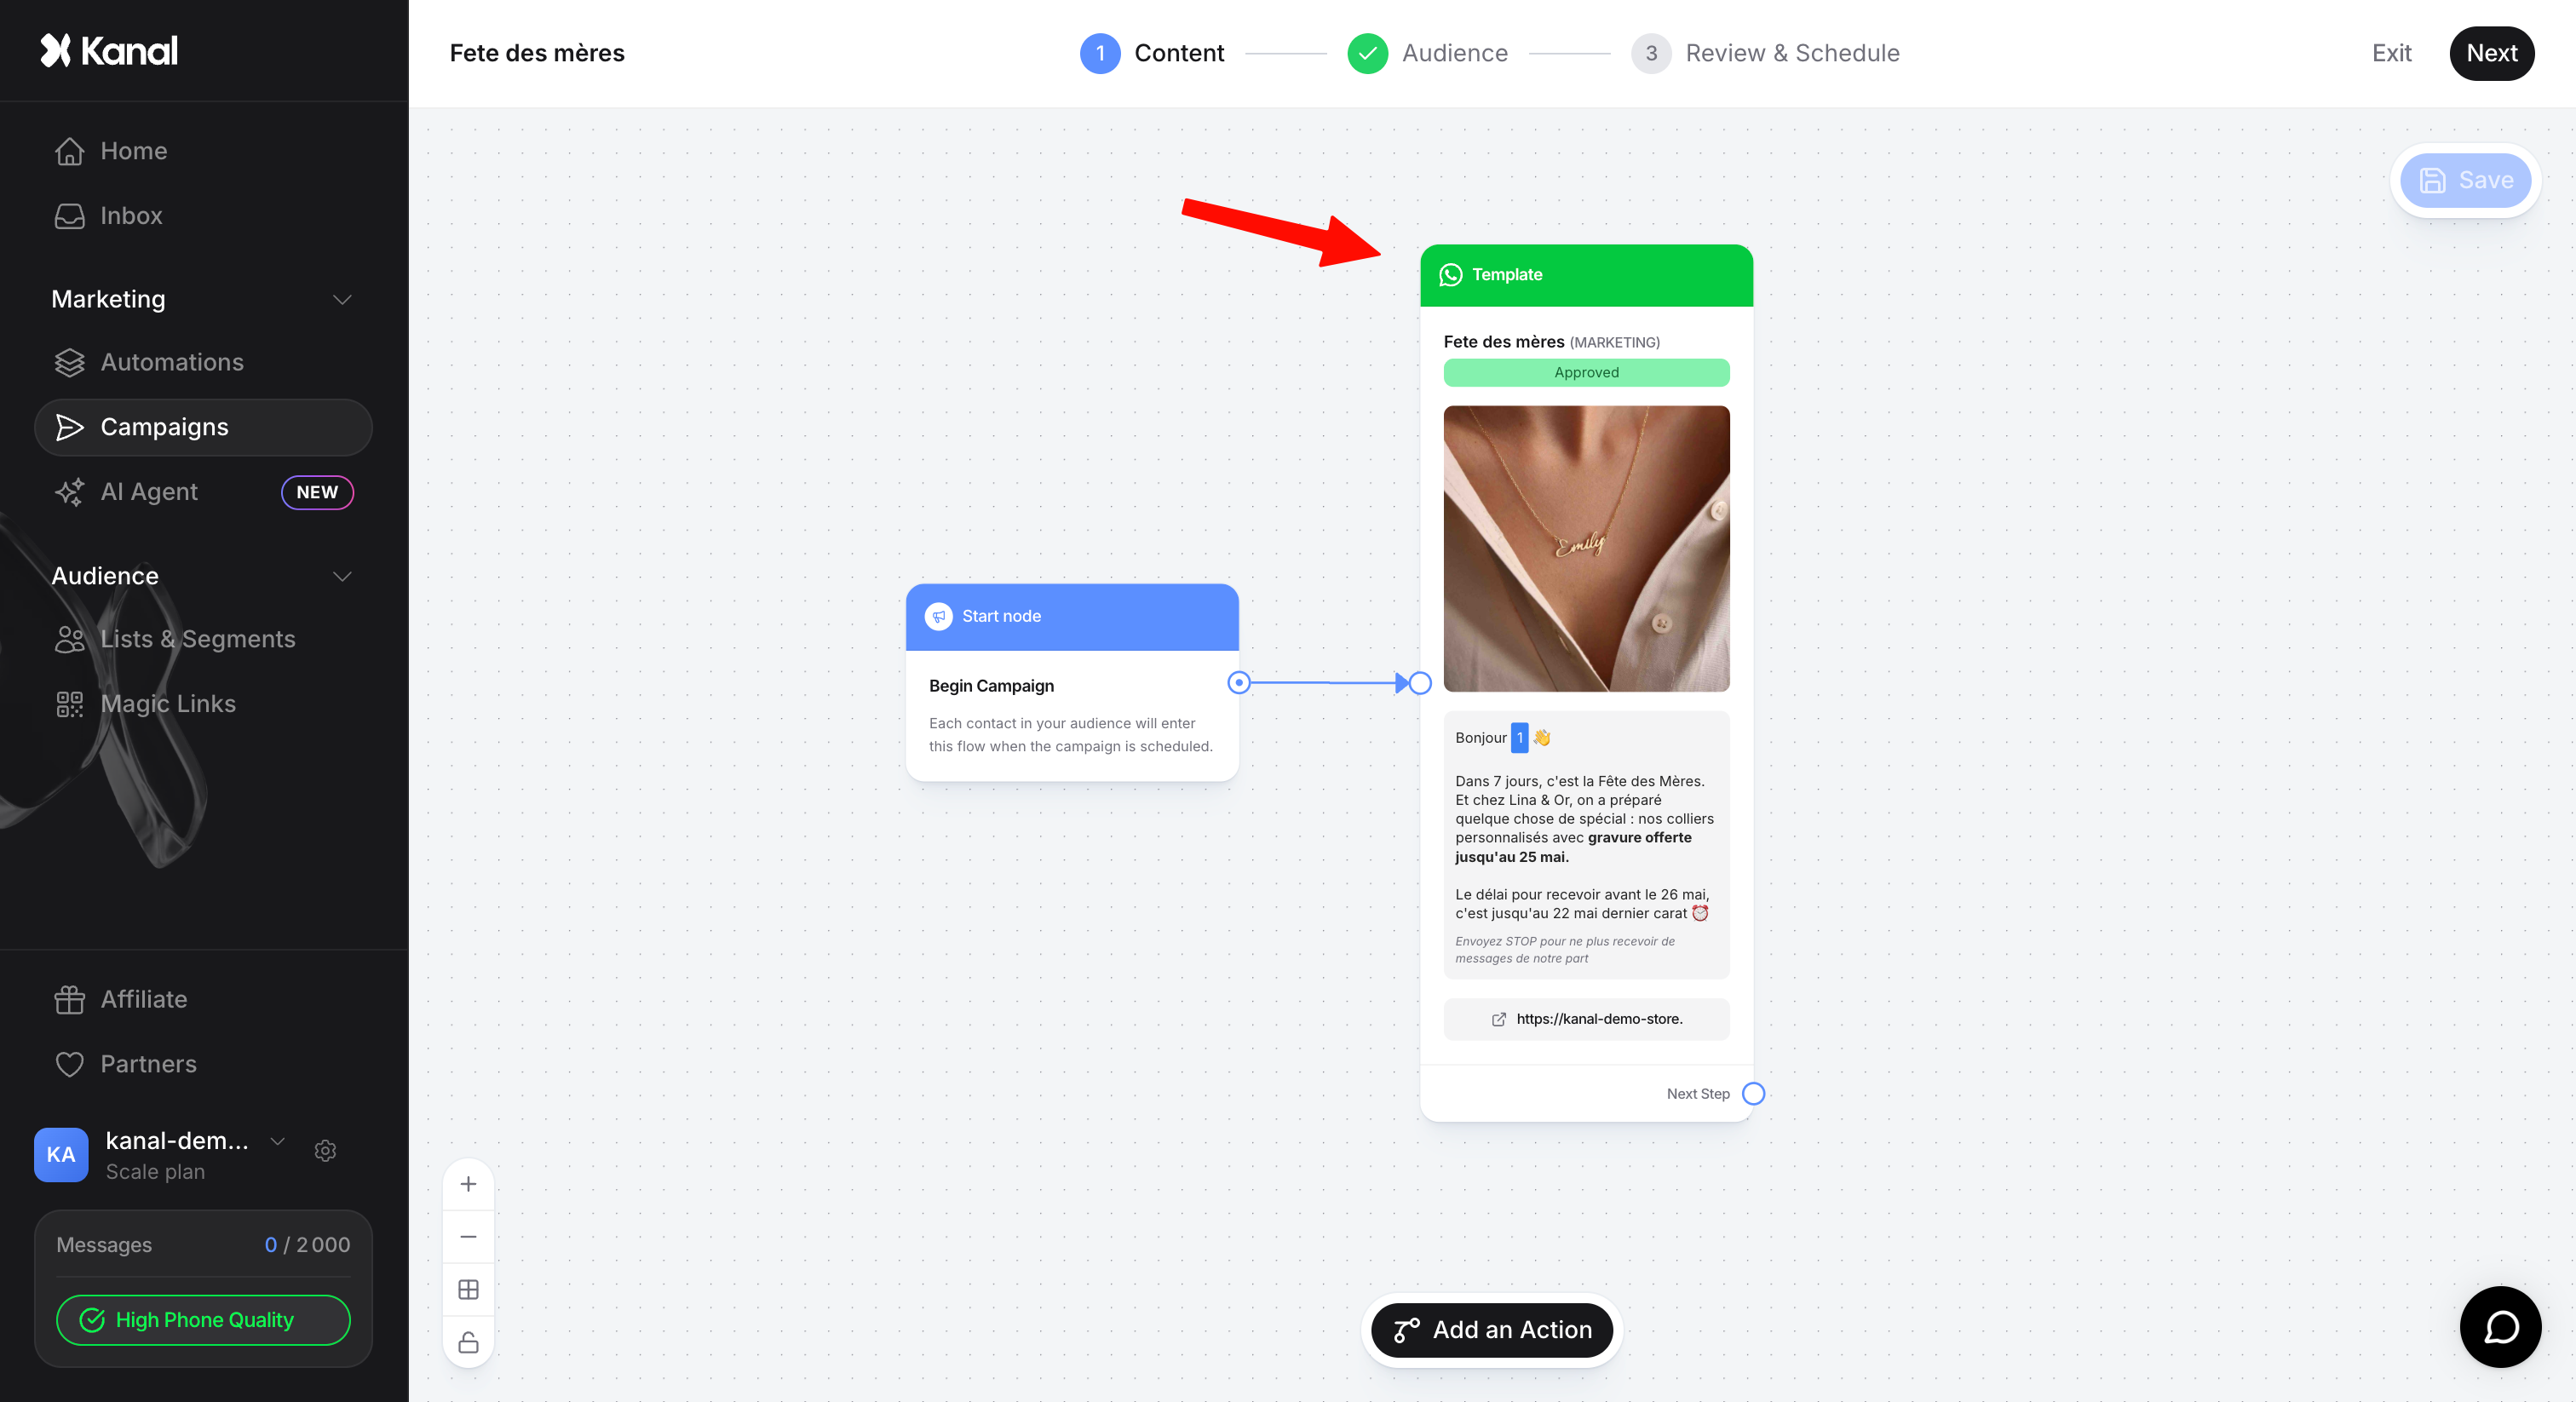
Once your structure is complete, click the Next button.
The new system lets you choose precisely who should enter your campaign flow. Several sources are available:
Kanal Segments or Lists: To target contacts already organized in your internal database.
CSV file import: To load an external, one-off database.
Klaviyo Segments: To harness the behavioral data of your synced Klaviyo account.
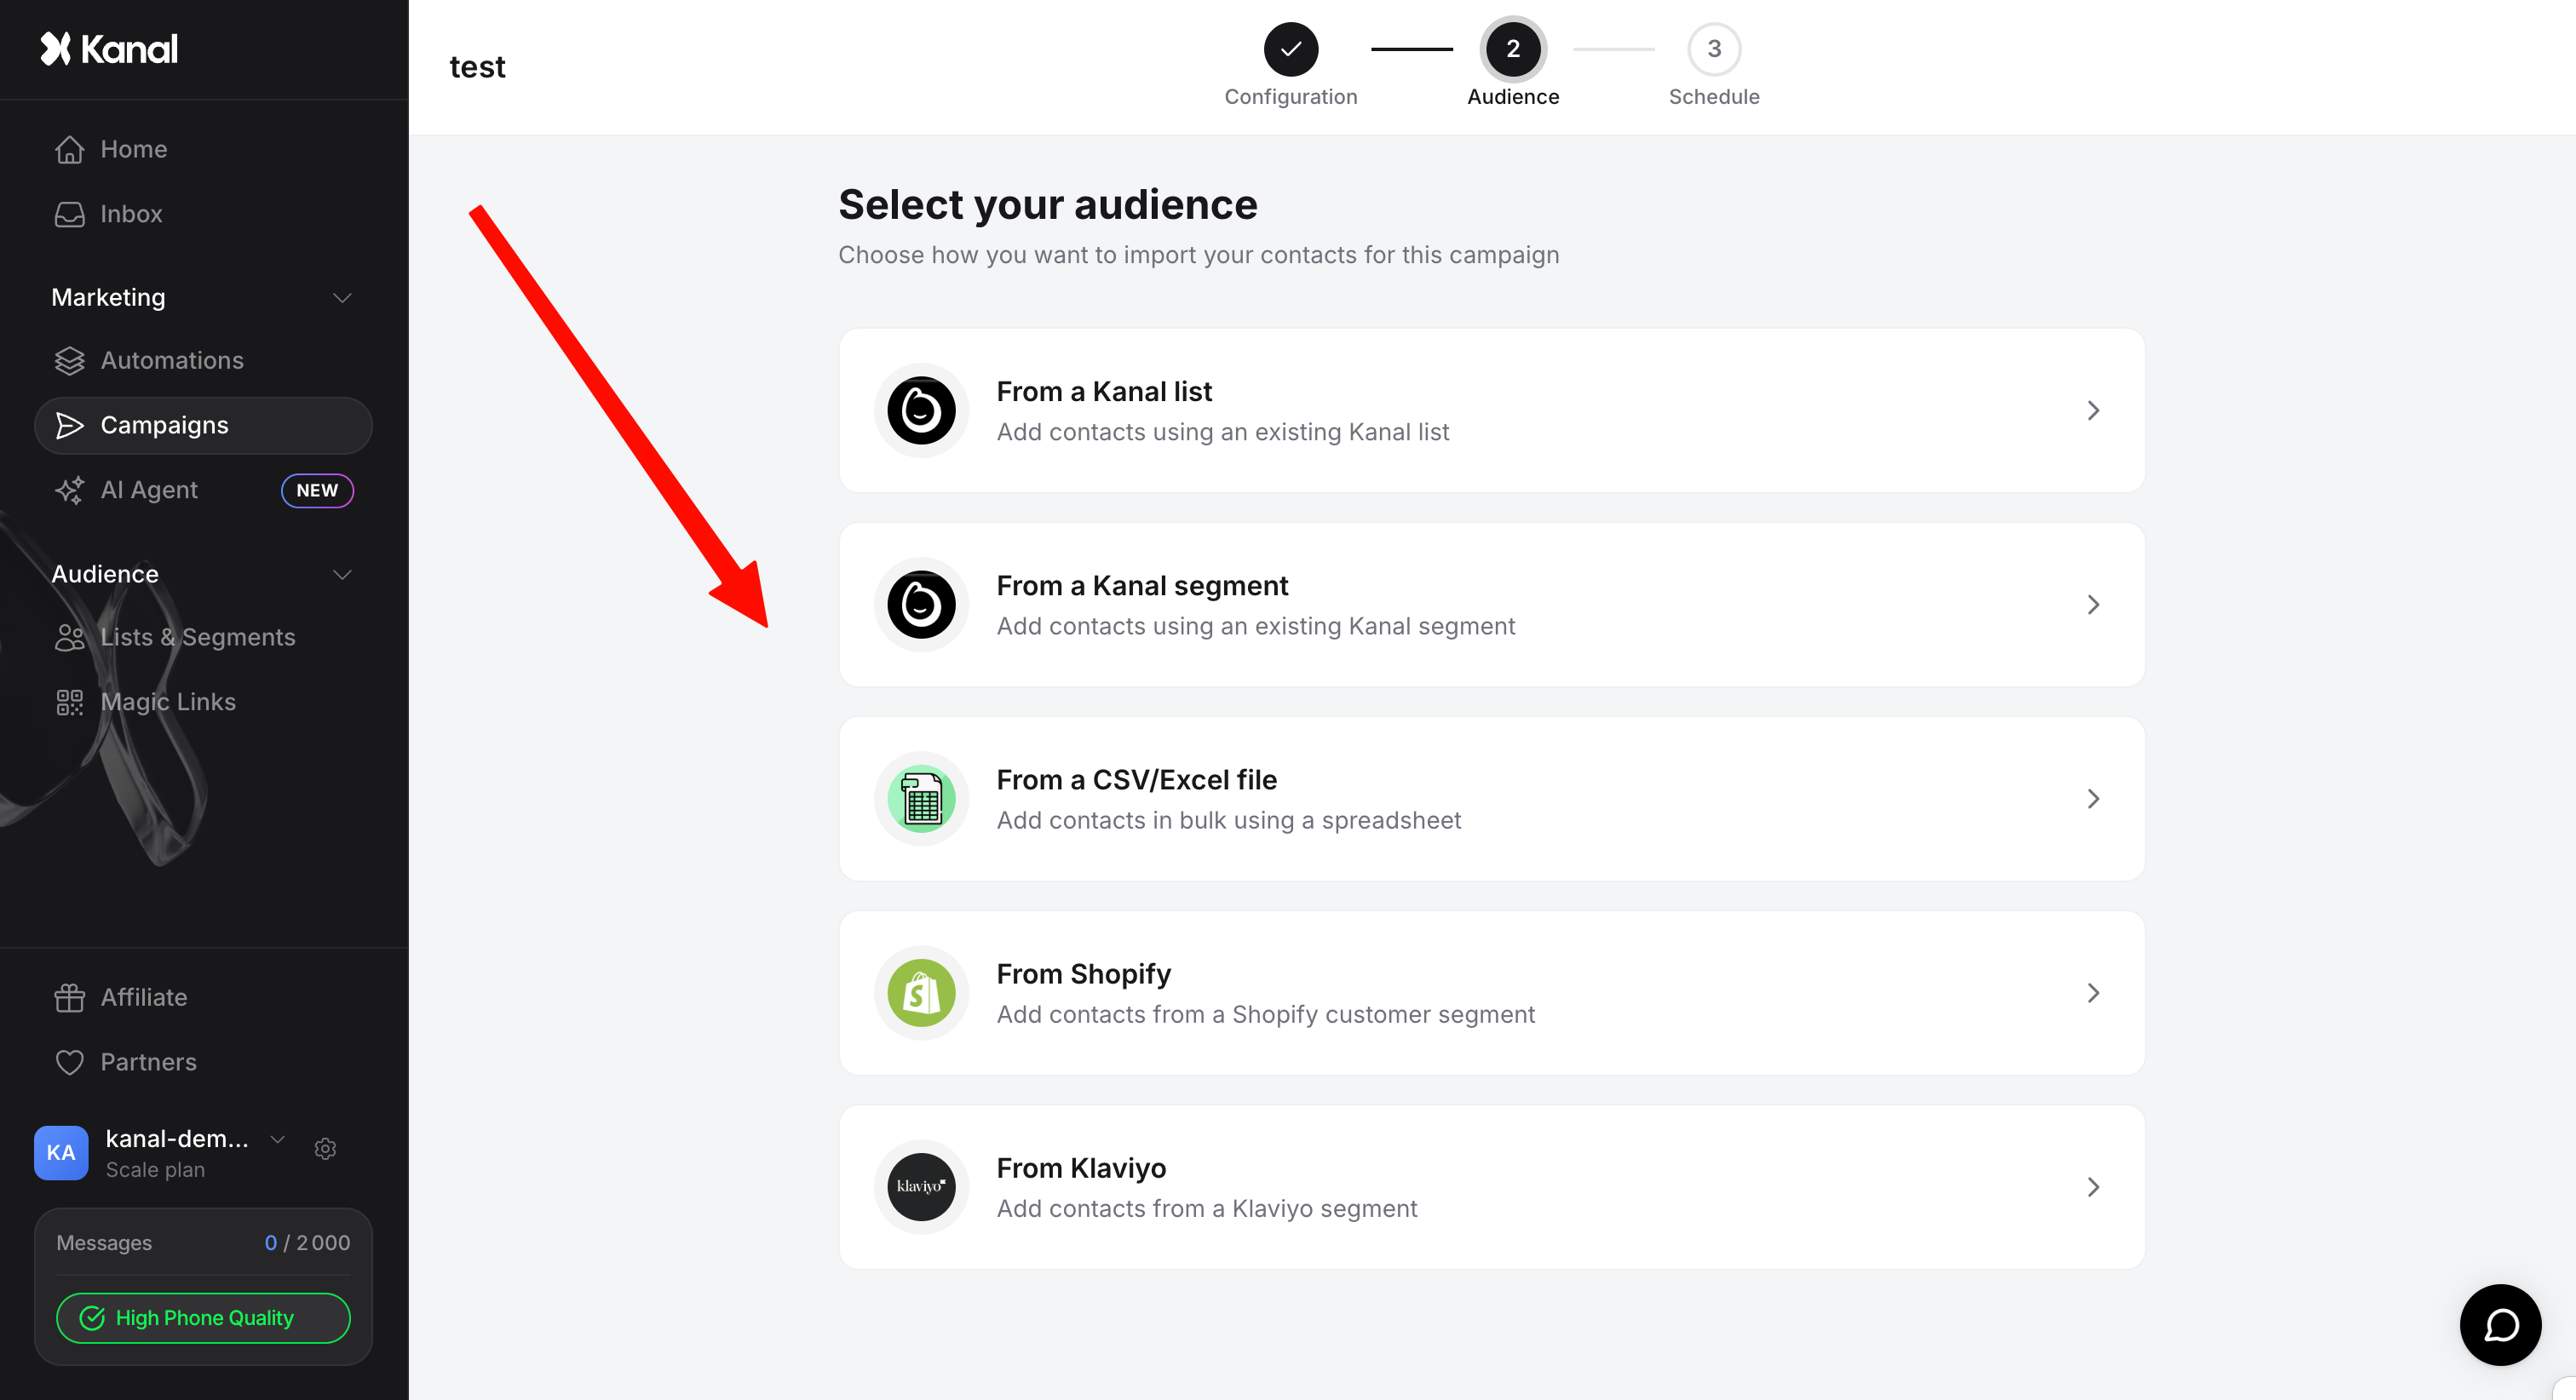
After selecting and configuring your source (including variable mapping if needed), click Next.
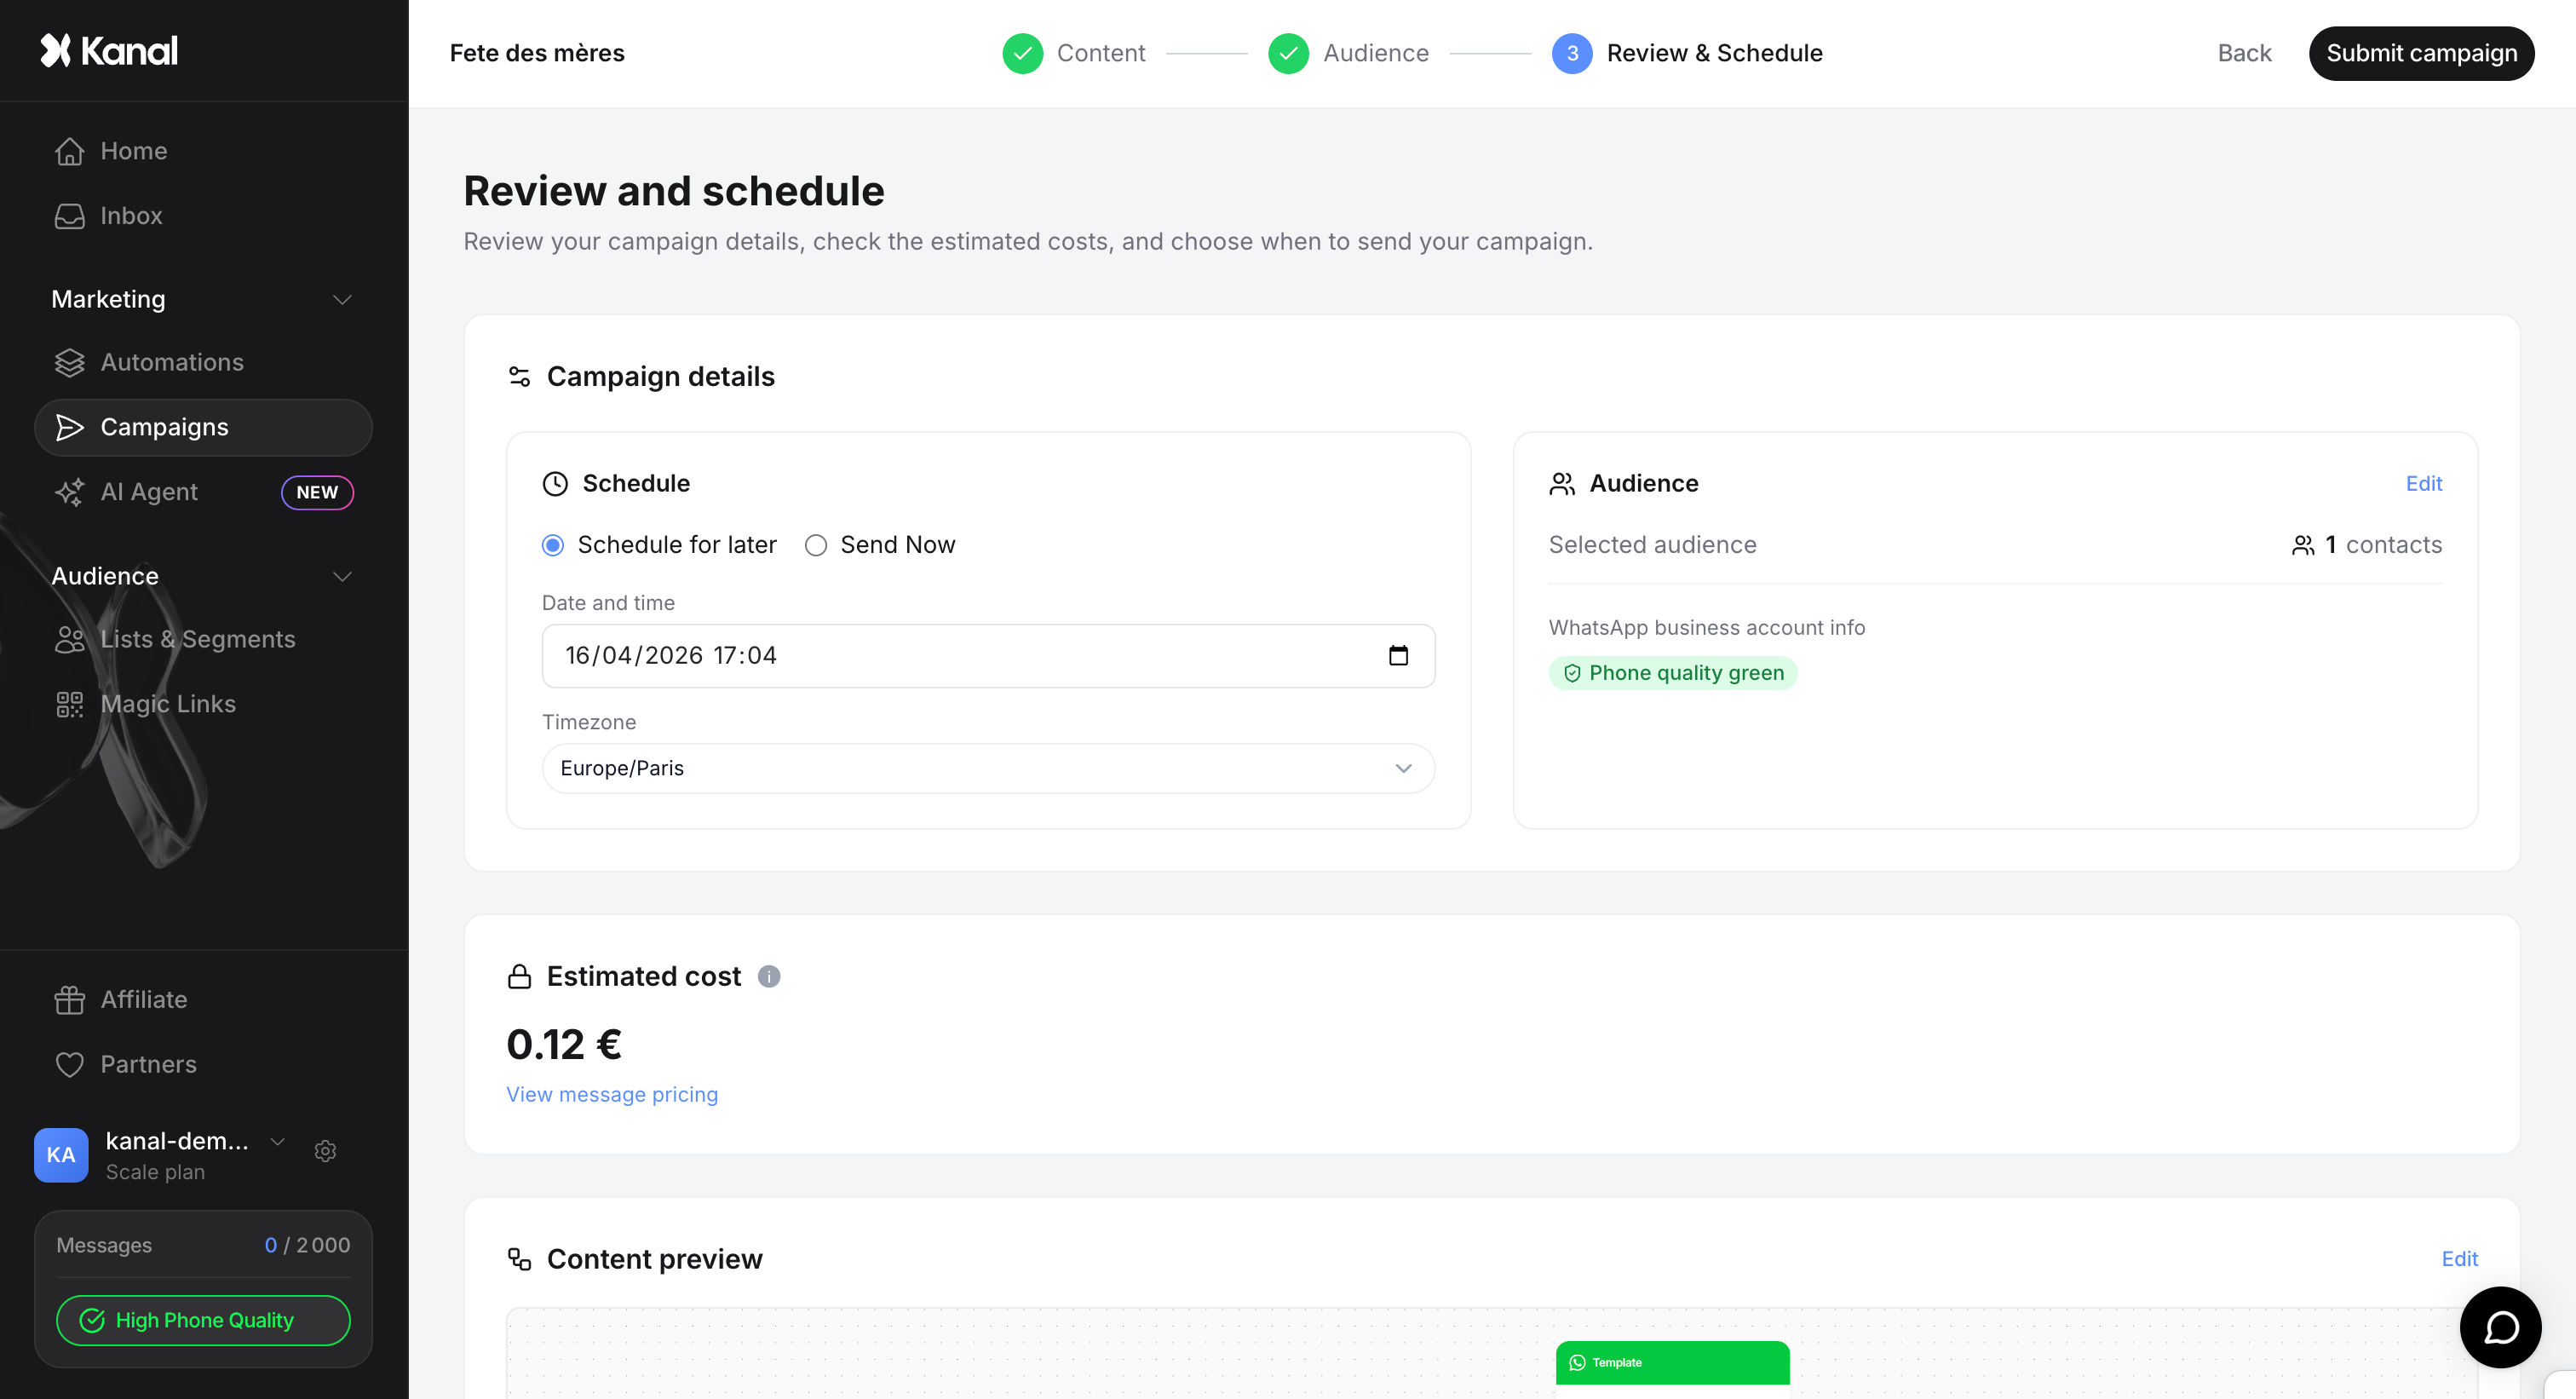
The final step lets you check the reach and cost of your operation before liftoff.
The interface displays an estimate of the total price of the campaign (based on Meta's rates) along with the full list of contacts that will be included in the send.
You have full control over when the campaign goes out:
Immediate send: To send as soon as it is confirmed.
Scheduling: Pick a specific date and time.
Timezone: Make sure the selected Timezone matches your customers' to avoid late-night notifications!
If everything looks right, click the Submit Campaign button.
If the campaign is scheduled, its status changes to "Scheduled".
If it is immediate, Kanal starts feeding your contacts into the campaign flow in real time.
Thanks to this Flow-style interface, you can now design much smarter campaigns. For example, you could plug in a condition after your campaign send to automatically tag customers who clicked, or set up an automatic follow-up 24 hours later for those who have not purchased yet, all within a single campaign project.